Waterfall Photography – Part One
Dell and I get a lot of requests from people asking how we photograph waterfalls and other types of moving water, such as creeks and coastlines so we’ve decided to write a short overview we hope will help. Actually, we’re in the process of putting together a complete video series that goes into much greater detail and hope to have that published and available soon. Stay tuned for that. In this post, we’re briefly going to cover the following topics:
- Essential Equipment: This will describe the absolute must have, bare-bones list of gear you’ll need to replicate the techniques we cover. We’ll also try to provide both low-cost entry level equipment, as well as some higher-end options.
- Camera Tips & Techniques: How you can get those soft, taffy-like images of waterfalls while keeping the surrounding detail crisp and sharp.
- Composition basics and making the most of your immediate environment.
- Post Production: How to use Adobe Photoshop and Lightroom to take your photos to the next level. We’ll touch briefly on it here, but in Part Two we’ll dive deeper and hopefully include some video tutorial information, as well.
What’s the Difference Between a “Regular” Waterfall Photo and a “Professional” One?
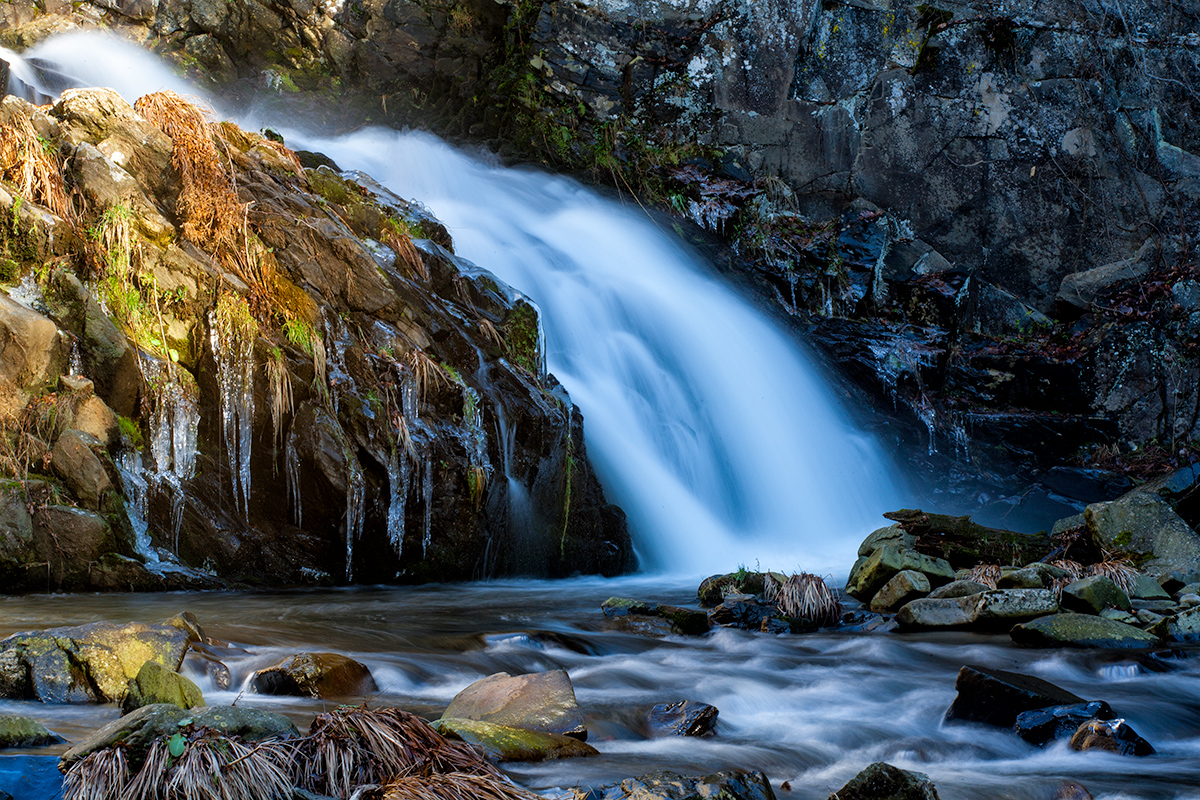
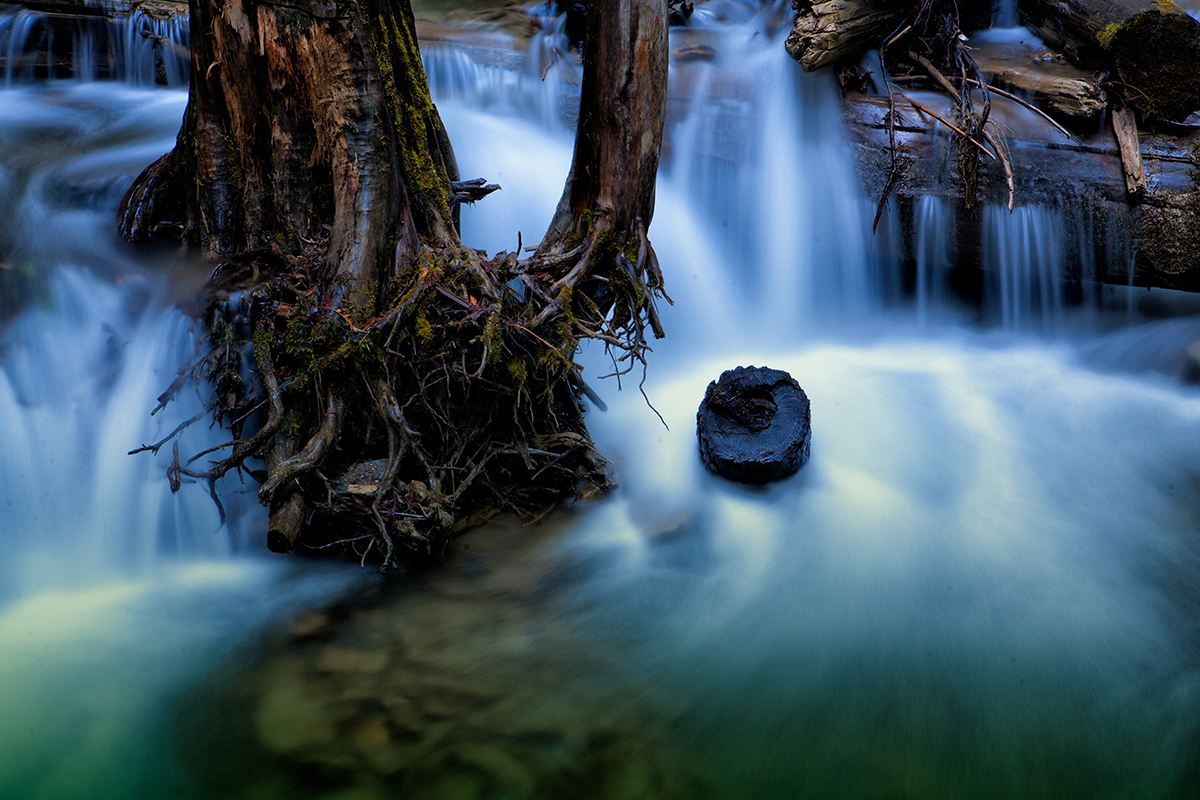
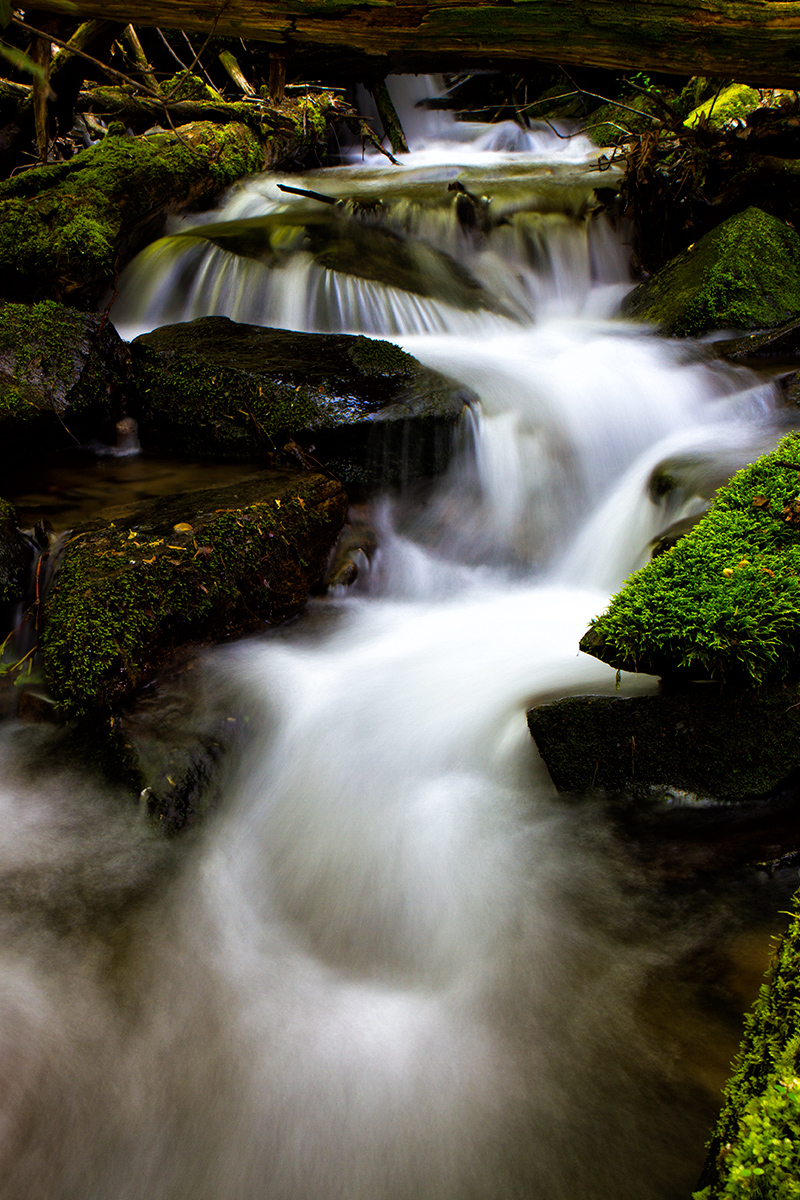
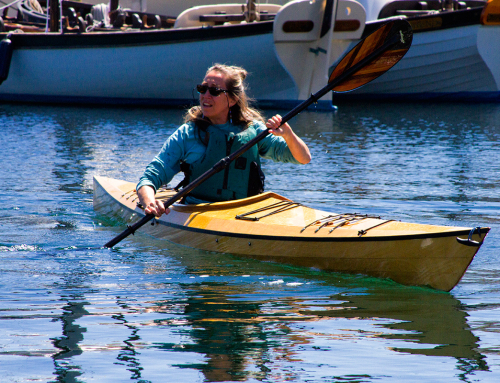
Generally speaking, most really compelling images of waterfalls, cascades, and other forms of moving water all have one thing in common – a soft, silky look to the water, rather than an image frozen in a moment with every drop and ripple in sharp focus. I’m not saying this isn’t valid, and it certainly is for many types of photos – especially sports and action imagery. I’m thinking white-water kayaking and surfing photos in particular. These not only look great in razor sharp focus, but they’d be pretty challenging to get with longer exposures unless you’re looking for blurry, speed-lined figures blazing through the picture plane ( I do sometimes and love the effect).
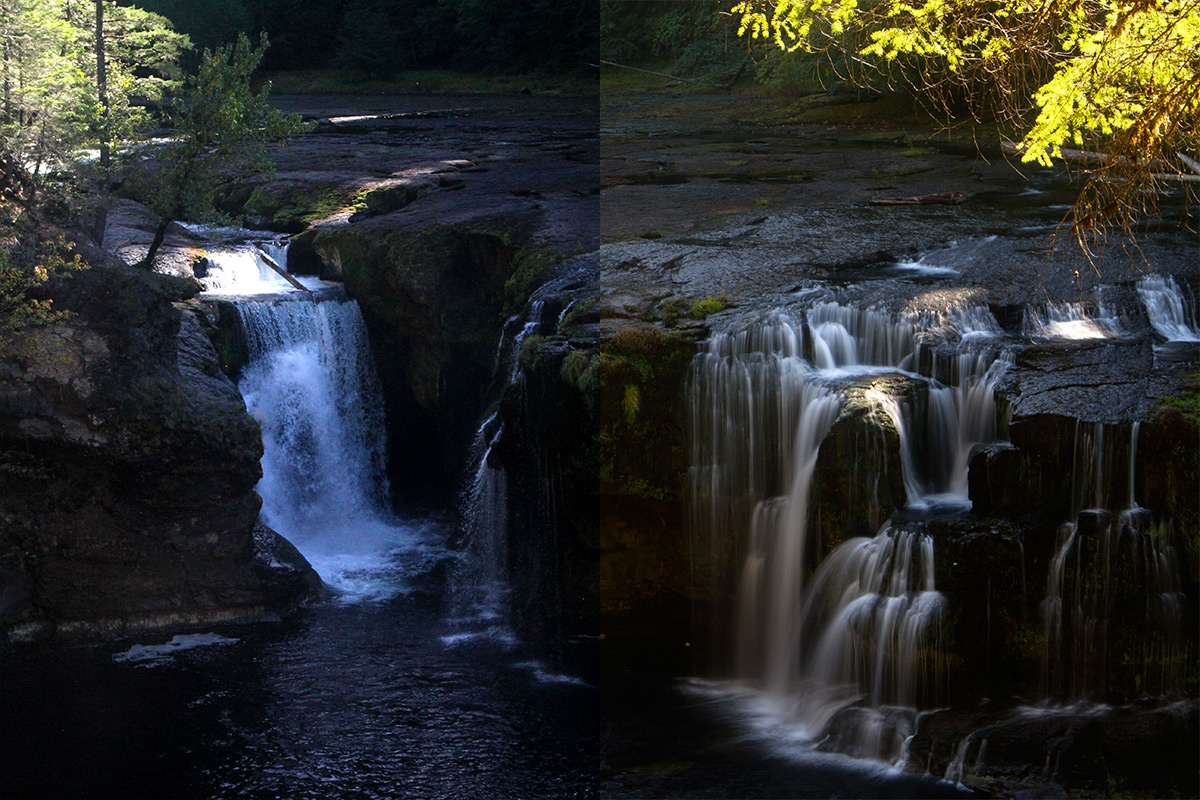
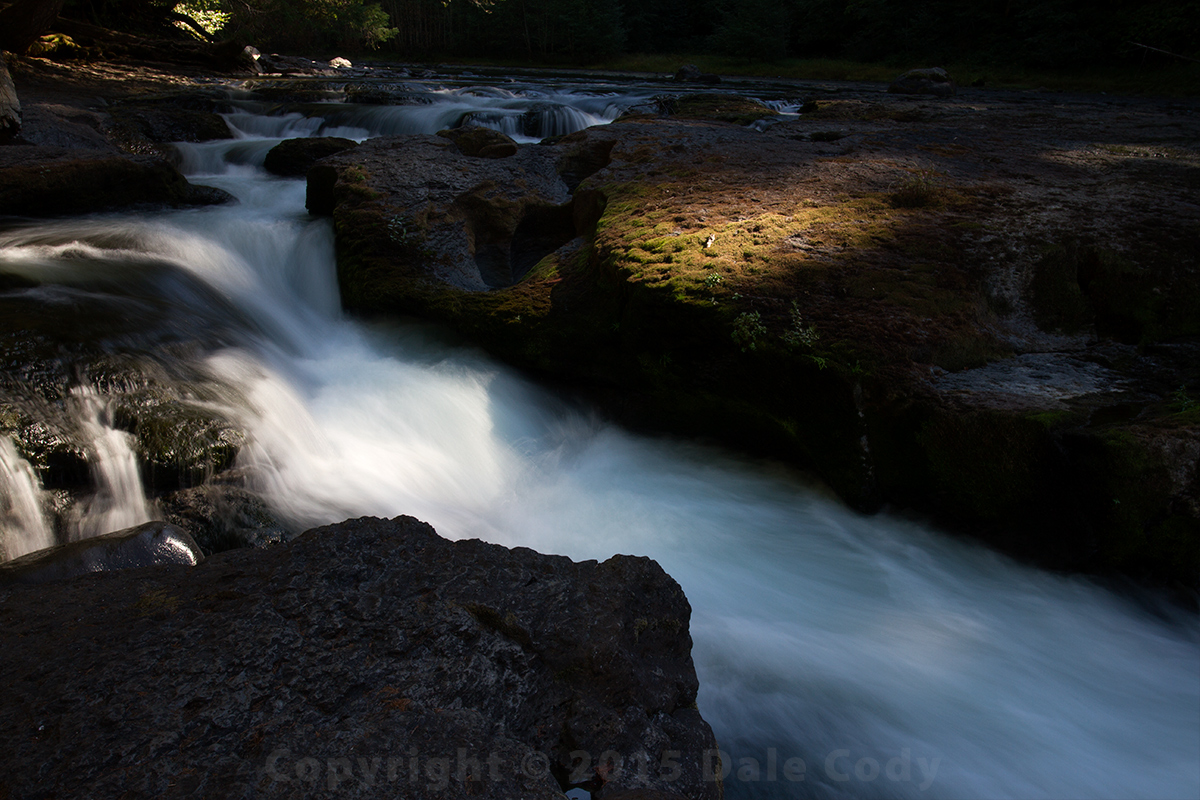
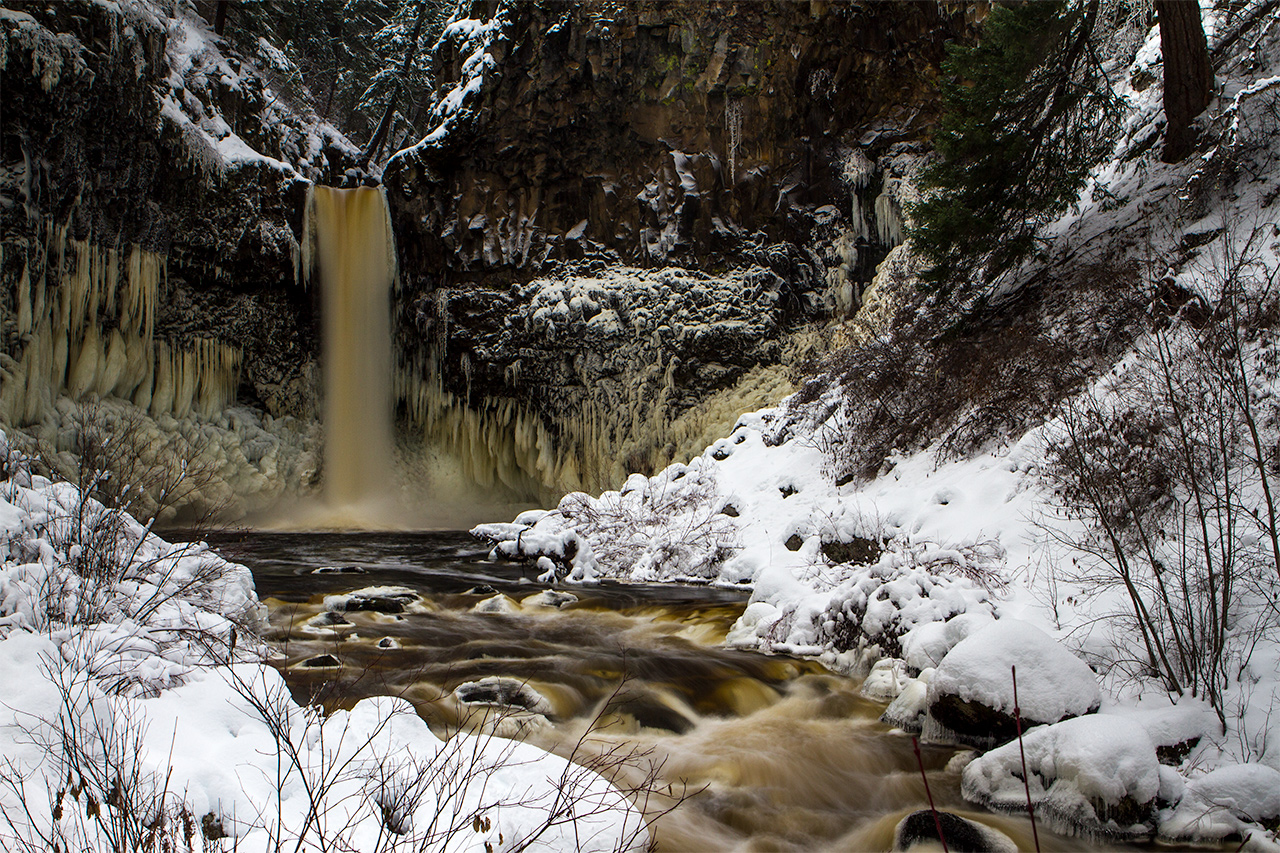
Take a look at the split view image above captured from the same tripod position. The left half was shot with a relatively fast shutter speed and is representative of what you might get with a regular point and shoot camera, or maybe a smart phone. The right half of the image shows the same perspective, but with a slow shutter speed (about 2.5 seconds), and using some of the techniques discussed below. Which one would you rather have hanging on the wall or posted on your blog? I think I’ll take the right half. That’s what this article is all about. This is what we are hoping this article will teach you. This shooting style is really easier than you might think, so hang in there and let’s have some fun.
Must Have Gear Guide
- Camera: Because making these kinds of images require long exposures, using a combination of very slow shutter speeds and complete control over aperture ( how much light gets in to the camera sensor), you absolutely must have a DSLR (Digital Single Lens Reflex) camera with interchangeable lenses. Both of Dell and I are big CANON fans and we rely heavily on our CANON 7Ds, although we also use the CANON 5D, as well. Other brands such as NIKON, SSONY and PANASONIC also make wonderful cameras and price points for different models in each brand can range from a few hundred dollars to several thousand. For a decent entry level camera, the CANON DIGITAL REBEL makes an excellent choice and can be purchased new for around $500.
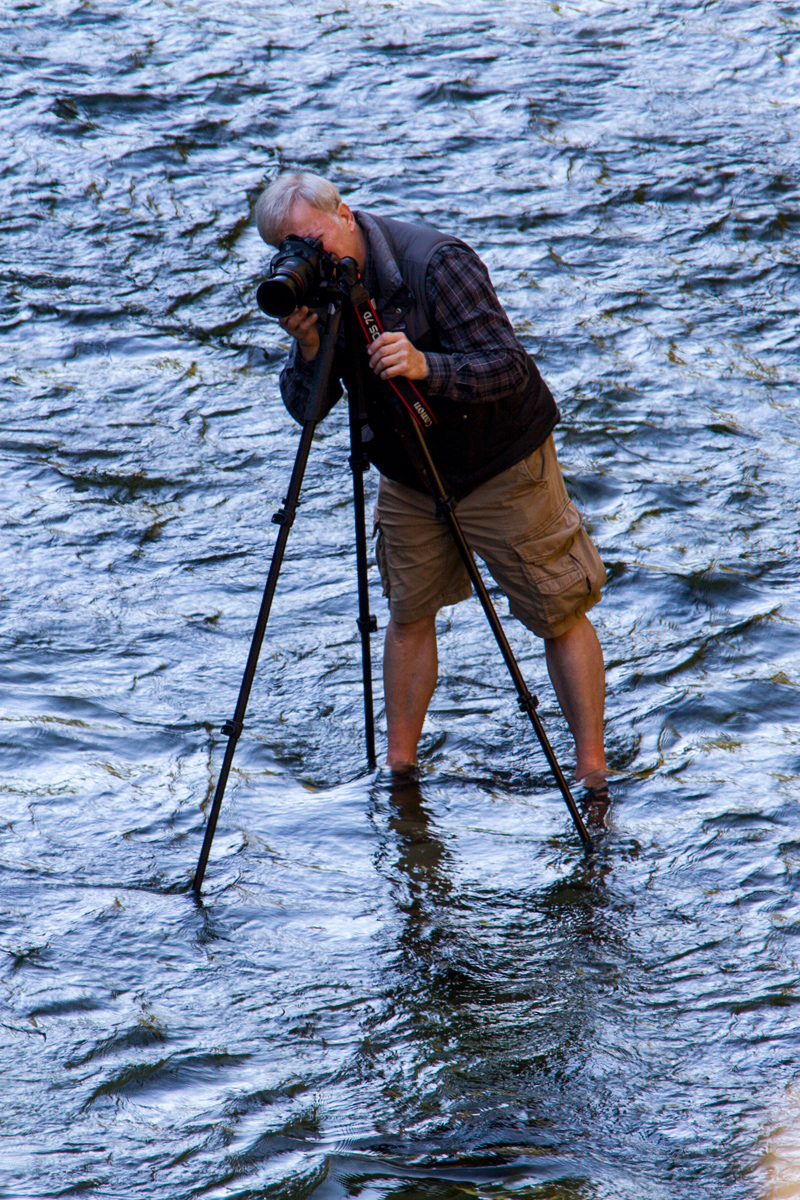
- Tripod: This is a critically important piece of equipmen,t because the long exposures mean that even the slightest camera shake, movement or vibration is going result in blurry out of focus images. It’s simply humanly impossible for anyone to hold a camera steady enough during a one-, two- or five-second exposure, and any attempt will be supremely disappointing. Sure, you might get lucky the odd time and find a solid rock or stump to place your camera and hope it’ll be level, afford the right angle and be a good distance, but it’s pretty poor planning to rely on something like that.A much better bet would be to invest in a decent tripod. The prices for tripods can range from under a hundred dollars to many hundreds, but you can get a really good one for roughly $200 -$300. Whatever you decide, I recommend getting a ball-head mount, as this will allow you to easily switch from horizontal landscape mode to vertical portrait quickly. I mainly rely on a MANFROTTO 294 aluminum tripod with ball head weighing in at around five pounds. It’s sturdy, flexible and will securely hold your camera even with a big telephoto lens attached. It’s versatile for most uses and light enough to pack in on long day hikes and photo excursions. For more serious multi-day adventures, or where weight and bulk are a real issue, I usually take my titanium MeFoto Travel Tripod. It weighs a little more than three pounds, has a ball head and packs up seriously small. It’s not as sturdy as my larger Manfrotto, nor will it extend nearly so tall. This can be a real problem when you’re trying to shoot waterfalls in parks where there are fences and guardrails. For some reason, they all seem to be about an inch taller than the tripod and I’ve had to figure out some really creative solutions in some of those situations. Also, they won’t really keep a big heavy lens stable in most circumstances, but at the right time and place, it’s been great.
- Lenses: One word – GLASS. Well two words actually – GREAT GLASS. What I mean by that is of all the components in your camera kit, the one thing you’ll want to spend your money on are the best quality lenses you can afford. For CANON, this means their top of the line flagship “L” series lenses. Top quality lenses easily run into more than a thousand to two thousand dollars each, and even more for specialty lenses. Generally speaking, the lenses that come with the camera when you buy it are not top quality lenses, although they may be decent and still result in serviceable photos. I recommend upgrading when you can. Everyone is different and each situation is unique, but you’ll probably want a wide angle lens. Some options might include a Canon EF 16-35mm or 17-40mm for example. This will often allow you to take nice shots of waterfalls and other landscape images with some object(s) closer in the foreground to help provide depth and visual interest. I also like the flexibility of a zoom lens in the 24-105 mm or even 28-135mm ranges. This gives you a lot of flexibility to frame your compositions very precisely, and we prefer to work that way. It’s in the DNA I guess from my background in design.Past that, I get a lot of use from my 70-300mm telephoto zoom (Dell uses her 300mm long lens), although seldom when shooting waterfalls as it turns out. One circumstance I do find myself using it, is zooming in close to almost macro levels when shooting flowers, mushrooms and similar subjects. I find it allows me to create nice images with out of focus or bokeh type backgrounds very easily.The other thing about lens selection is to get one with the lowest F-stop you can afford, say 2.8 or even 1.4, though the price tag on these lenses is hefty. Without going into detail, a lower F-stop opens the aperture more, which lets in more light, but also results in a shallower depth of field. This is wonderful for creating images where the subject is in laser sharp focus while the background is nicely blurry, or comprised of beautiful bokeh to frame the object of attention. Just be aware that lower numbers here usually mean higher prices. Note* If your lens has built-in image stabilization, turn it off when your camera is mounted on a tripod. Ironically, this feature will actually result in a less sharp image in this circumstance.
- Filters: For creating images with long, slow shutter speeds, you’ll need a neutral density filter or filters. This is probably the most important secret Ninja formula for those unfamiliar with making great waterfall or moving water images where you want that soft dreamy taffy look of the water. Here’s why: NEUTRAL DENSITY LENSES act like little sunglasses for your camera lens and that is important because looooooonnngg exposures let in tons more light of course, way more, in fact, on an even marginally bright day than any combination of aperture and ISO could possibly overcome. So, unless you want your carefully set-up photos to be anything more than a bright white washout mess, you’ll need a neutral density filter.You can get neutral density filters in either fixed single stops such as two, six or nine where larger numbers mean a darker filter, or you can use variable neutral density filters that allow you to adjust the amount of darkness by turning the outer ring against the inner ring screwed onto the camera lens.Fixed filters probably have slightly better image quality stop for stop, but I find the convenience and flexibility of a variable filter far outweighs the slight performance hit. For example, on a reasonably bright day, you’ll probably end up using a nine stop filter and the problem is with that amount of darkness, you can see to compose and focus your shot. In that case, frame and focus with the camera firmly mounted on the tripod and then carefully screw the neutral density filter onto the lens without bumping or moving it and then take the picture. (Slow, tedious and often met with frustrating unplanned movement of your ideal composition.)Another filter you’ll want around water (and elsewhere actually) is a circular polarizer. By adjusting this filter, you’ll be able to control reflections on the water and the darkness of blue in the sky for example. This is something that even the wonders of powerful post-production software like ADOBE Photoshop and Lightroom can’t completely remedy, even though there are some techniques for mitigation depending on circumstance.One filter you no longer need for most landscape photography situations is a gradient filter. In the not so distant past of say four weeks ago (kidding), it was commonplace to mount one of these on a kind of slider holder attached to your lens to allow you to capture a nice dark-to-light gradient in the sky. The power and capabilities of post production editing programs like Photoshop and Lightroom have largely made use of these filters completely unnecessary.
- Miscellaneous Gear: You’ll either want to use the self-timer on your camera to trip the shutter, or invest in a cable or wireless release system. Choice of those will depend on your budget and camera model as some older models don’t have built in wireless capability.
In-Camera & In the Field How-To Guide…
Now the fun part… Being out in the field! In the complete video training series Dell and I are producing via DHARMAPHARM, one the the topics we’ll be adding is where and how to find great locations for photographing waterfalls, creeks, rivers and coastal areas. We’ve traveled and shot these subjects all across the continental United States and Canada, as well as various places overseas. Having said that, we’ve found wonderful waterfall opportunities virtually everywhere we’ve traveled including some very unlikely spots.
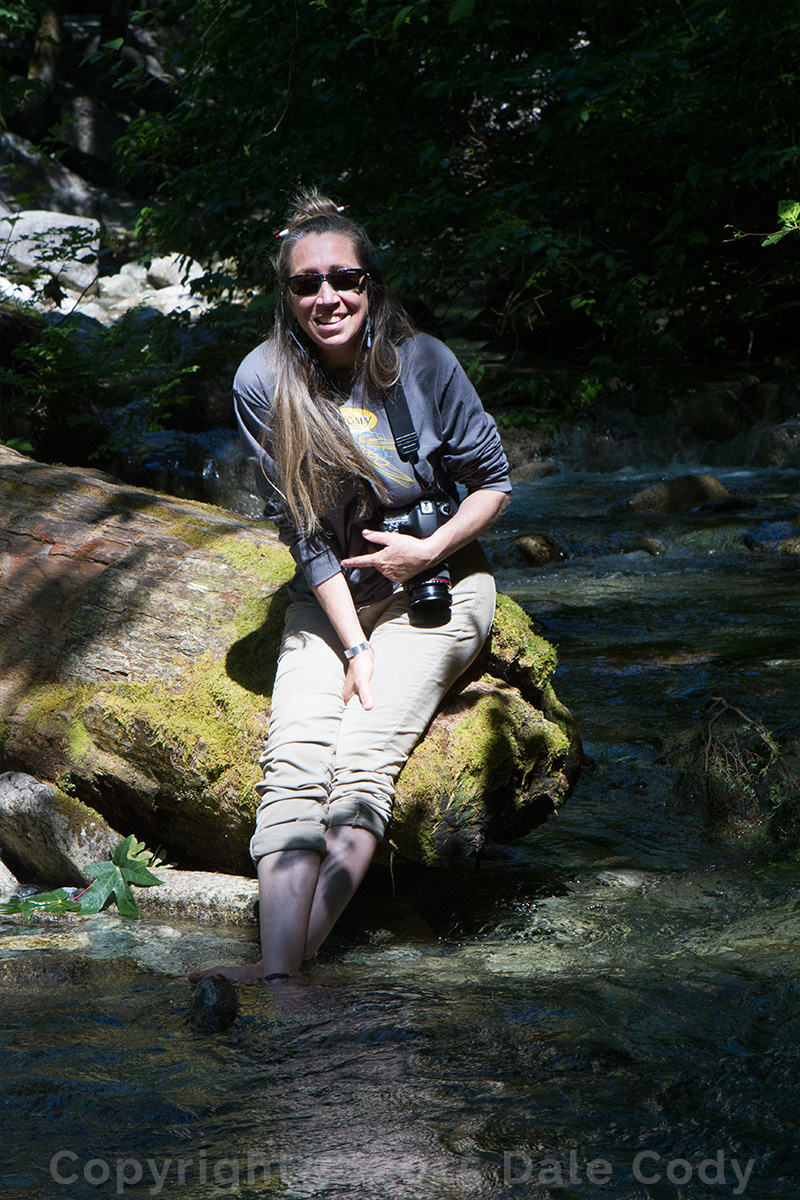
INSERT PIC OF DELL HERE…
Unless you’ve been to an area before, or talked to someone who has, it’s usually pretty challenging to know exactly when and where the sun will shine on the waterfall, and that it is important information. It also changes depending on time of year. For example, the sun might shine directly on a waterfall situated in a deep canyon during the summer months, but not at all during Fall or Winter when the sun’s zenith doesn’t reach that high. You can still take great photos without direct sunlight of course, but it will affect how you approach the shot. Looking on maps and doing some research to find out which direction the falls face for example will help, but by now means a definitive substitute for being on the ground.
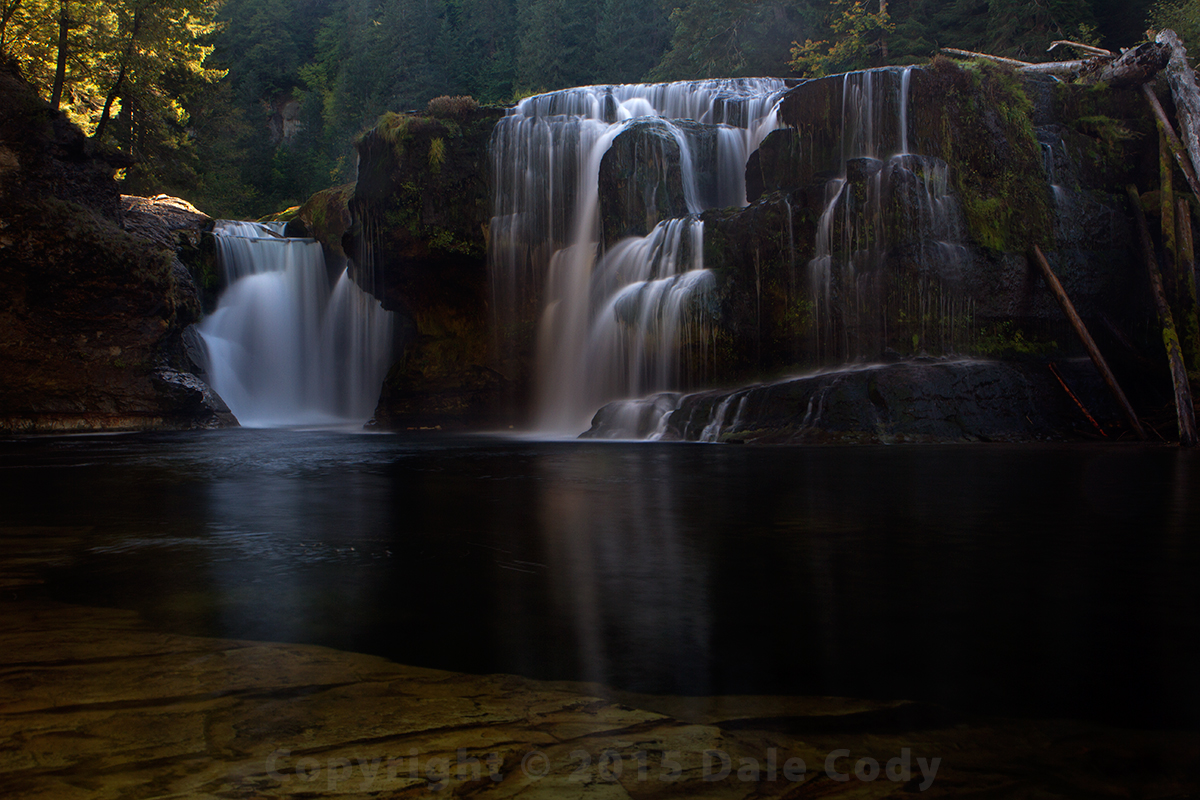
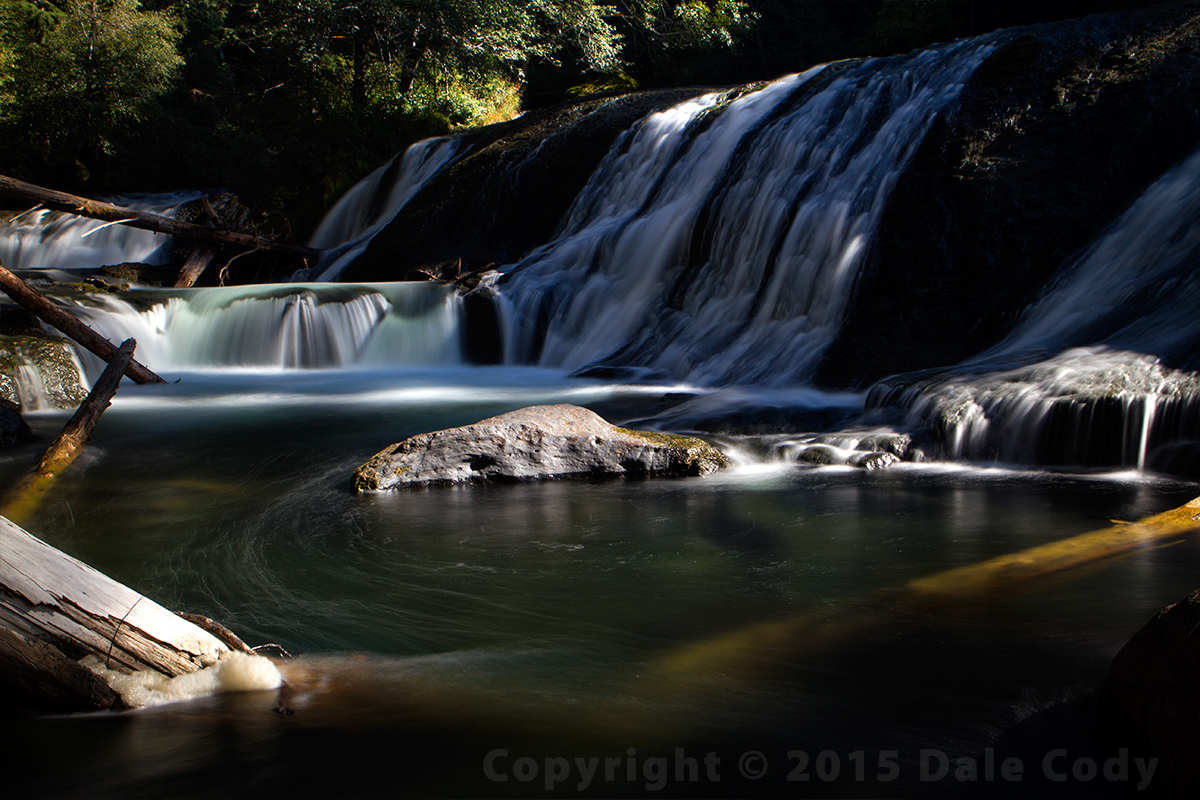
Using the environment to best advantage. Once you’ve chosen your location and arrived ready to shoot, a good way to start is taking some time to carefully examine the area and look for shooting angles. Try thinking about the features and elements that are currently available that could aid you in composing a great image. Could you get in the river downstream and use those rocks in the foreground, or use trees to as a framing element from above? This is the time to put your creative thinking cap on and design your photo rather than just pointing the camera and taking a shot from the same place most everyone else does. This is the defining difference between a nice shot for wall and something that will be showcased on 500 px or Nat Geo.
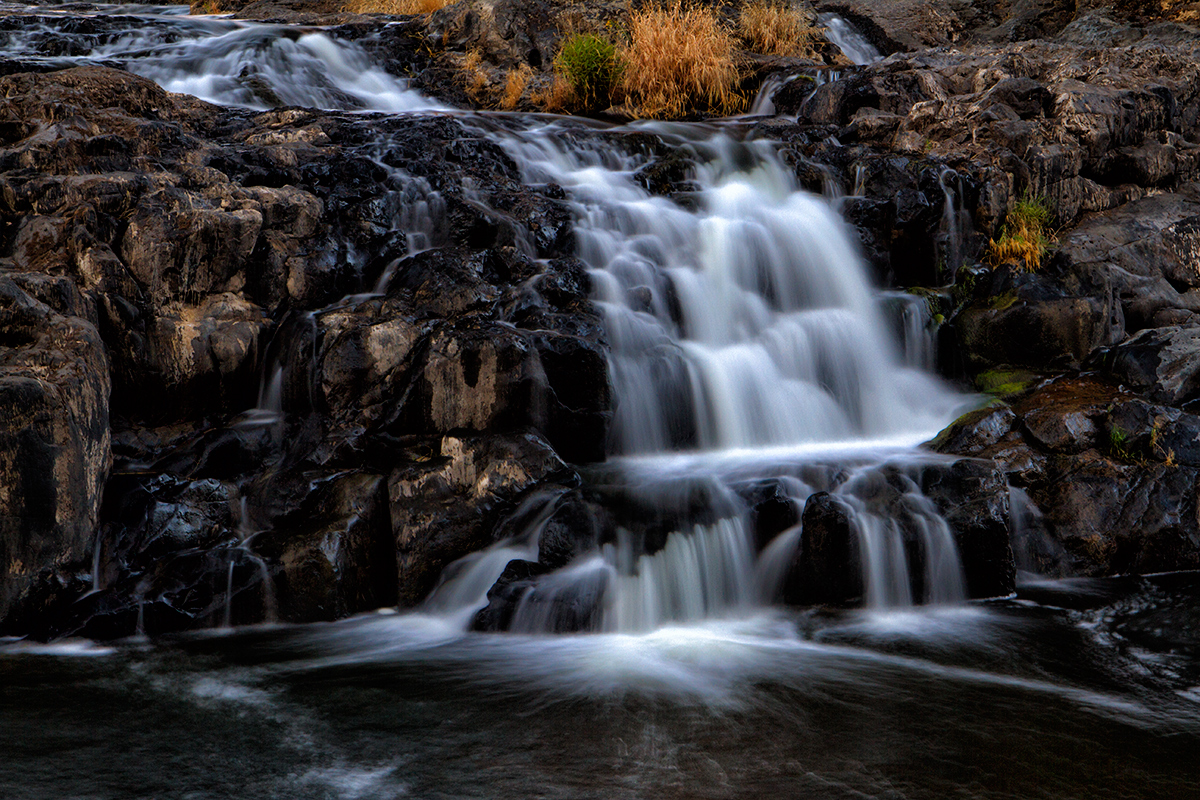
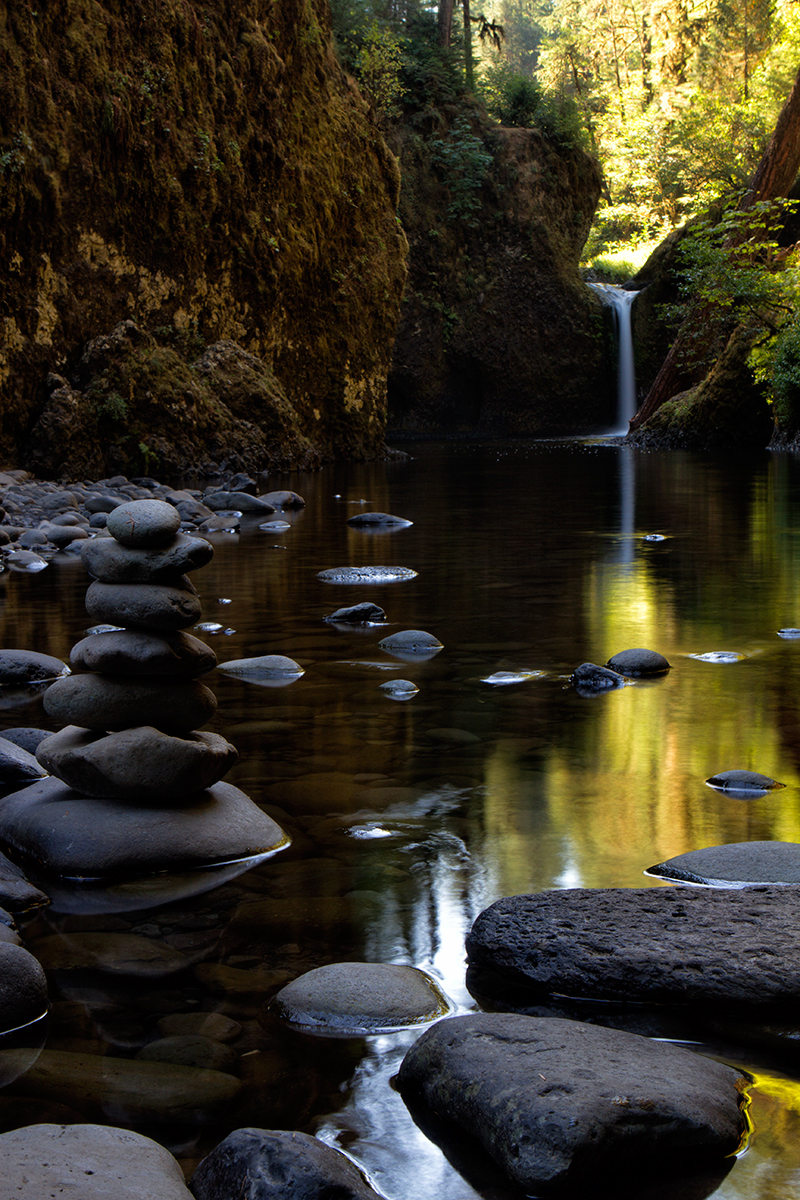
In order for your image to be strong, it also needs a focal point, and while the impulse is to automatically use the waterfall for this, it isn’t an absolute necessity. For example, one morning I hiked in to Punchbowl Falls before dawn and waited for the sun to come up so I could frame my composition with the falls as centerpiece. Dell and I had scoped it out a few days earlier and she couldn’t be there that day because she had a trip out to the Appalachia again next day. When the day lightened enough, I saw that someone had built all these cool rock cairns, and so I found a way to use one of those as the focal point and have the waterfall in the background so they balanced somewhat. I moved into the water so I could offset the two elements and use implied lines to lead the viewer’s eye into, through and then back through the composition. I went in with an idea in my mind and then changed it; adjusted to suit the new reality I found on the ground and I think the final result was much significantly stronger than my original idea. In fact, that almost always turns out to be the case. So while I do go into an area with some concept of what I’m looking for in terms of image making, by keeping my eyes and senses open to new opportunities, I virtually always emerge with something I hadn’t expected. This is something I’ll write about in another blog post. By contract, Dell’s background in photojournalism allows her to spontaneously choose her topics based on what she sees in the moment. It’s a different style of shooting, but the combination works well for us.
The Meat and Potatoes – Rubber Meets the Road Bit… Sorry to my vegan friends for this description, but in this part, I’ll describe basic set-up and specs to get you going. To make those long beautiful silky type images you’ll want to start with the following basic settings:
1) Set your ISO as low as you can. For the Canon 7D that’s ISO 100, and for other cameras it’ll probably be either ISO 200, or whatever their lowest setting is. Don’t sweat it if your’s doesn’t go to 50 or 100. It’s not a deal breaker by any stretch.
2)You’ll most likely want your APERTURE between F8 and F16 for max depth of field and sharpest detail. Every camera and lens has its own perfect max sharpness sweet spot and it’s usually in that F8 to F11 area, but not always. Common wisdom would tell you that if you just stopped your aperture down even further, to say F22, you’d get an even sharper image, but that is not the case. The science behind that is too complex and lengthy to go into, but trust me on that.
3)Now you’ll want to bracket some shots with your SHUTTER SPEED somewhere between 1 and 4 or 5 seconds, but again this is not a hard fast rule. It’ll depend on a combination of how fast the water is moving and how much volume of water there is. Faster and more volume requires less length whereas slower and/or slower moving water will require longer exposures to get the effect you want. Too much and you’ll find the water lacks all detail and becomes just a soft blurry fog and too little ends up seeming too hard. It’s a matter of taste. So you have the settings down like I just mentioned then you look through the eyepiece and what you see is… blazing overexposed white nothing. WTF you say… What missing is the critical element we talked about just previously and that is the neutral density filter.
Without the “sunglasses” effect provided by that all important neutral density filter on an even moderately bright day, there is NO WAY you can properly expose for the image we want here. So screw that baby on and start adjusting for exposure. With a variable neutral density filter you just revolve the ring back and forth around for darker or lighter until you reach the optimal exposure. Like I mentioned previously though, if you’re using single stop neutral density filters, you’ll need to try them one at a time until you find the right combo. With practice, you’ll probably be able to make the right choice first time though. With a very dark 9 stop filter like I said earlier, you’ll need to frame the composition and then carefully put the filter on the lens. If you are using a variable model, you probably don’t want to use it at max darkness since your image quality may be degraded or you might get weird moire patterns starting to appear. Anyway, I highly recommend you bracket your shots with various settings so you can choose the one(s) you prefer later and then do post processing on those select few.
A few suggestions here that might help… If you have a sky in the background somewhere, I suggest taking some images with the correct exposure for the waterfalls and then take some with a darker exposure for the sky so we can composite later in post production and get the best of both worlds. Typically, if you expose correctly for one, you either blow out or under-expose for the other it seems. Having different exposures from the same locked down camera position will provide huge flexibility later for compositing in Photoshop.
As I mentioned earlier, a circular polarizer filter will also help you reduce reflection on the water (not so much the falls as the creek or pools of still water) and see beneath. You can use a polarizer filter with a neutral density filter, but I’ve found it’s pretty tricky. First off, they both work work by turning one ring on a bezel around a stationary one and when you’re looking through what amounts to a pair of really dark sunglasses, it’s pretty challenging to make proper adjustments. You can sometimes capture interesting (and by that I mean hideous) moire patterns mixing these two in combination. So I recommend some caution, and take the time to review and zoom in to see close-up in camera what your photos are looking like while you’re still in the field and can do something about them. There’s nothing worse than getting back to the studio and finding all your images on the computer screen blurry or funky looking and having no fall-back photos.
Post-Production – Where the Magic Happens..
Great Images in the Field Are NOT the Final Step – They are, of course, the critical foundation, and without a strong foundation there, all the Photoshop wizardry in the world won’t salvage your photo. We’re going to discuss Photoshop, Lightroom and other post-production techniques in a follow-up post as well as some video demonstrations that we’re putting together for a more expansive training series on Udemy. We’ve been out in the field filming as well as recording in the studio for that next chapter, and it’s been both fun and challenging. We can’t wait to share it with you!
About the Authors
Dell Hambleton and Dale Cody are partners in life and business, which is to say creative careers and a nomadic life. Together, they own and operate DharmaPharm.com, a full-service boutique studio dedicated to helping solopreneurs, small businesses and crowd-sourced projects to succeed. For much of the last two years, Dell has been doing research across the USA for a documentary film project. Principally centered in the southern Appalachia of North Carolina, Going2Water will take Dell and Dale on a 1,500-mile kayak journey. They will be exploring Dell’s mixed Cherokee, Choctaw and Scots heritage as it relates to the 1838 Trail of Tears Native American Removal along the little known water route. This will be the first time it has been attempted in its entirety by a woman with Cherokee, Choctaw heritage since the horrific forced relocation more than a 177 years ago. This is something both Dell and Dale will be attempting during the summer of 2016. Dale gave up a high-profile career as an award-winning Creative Director more than two years ago to travel around the globe and then back and forth across the continental USA and Canada. They have recently stopped over in Portland, Oregon to prepare for next summer’s challenging journey, but continue to travel, photograph and explore anywhere and everywhere they find inspiration. They have just opened their first joint photographic gallery show in Portland and are already organizing images for the next..
As always, if you have any comments or suggestions as well as specific questions, please post in the comments section or send and email. We love to hear from you. Stay tuned for that and happy shooting!
